What I wanted:
I started this project with a rough sketch of what I was looking for. I knew that I wanted it to be about 20” tall (to just sit under the window sill) and about 32” wide. I also wanted it to have 2 shelves for shoes and a top shelf to put a plant or a couple books. (Reality- our 2 year olds favorite game seems to be taking the shoes off the shelves and after trying them all on, he leaves them sporadically around the room.)
What I did:
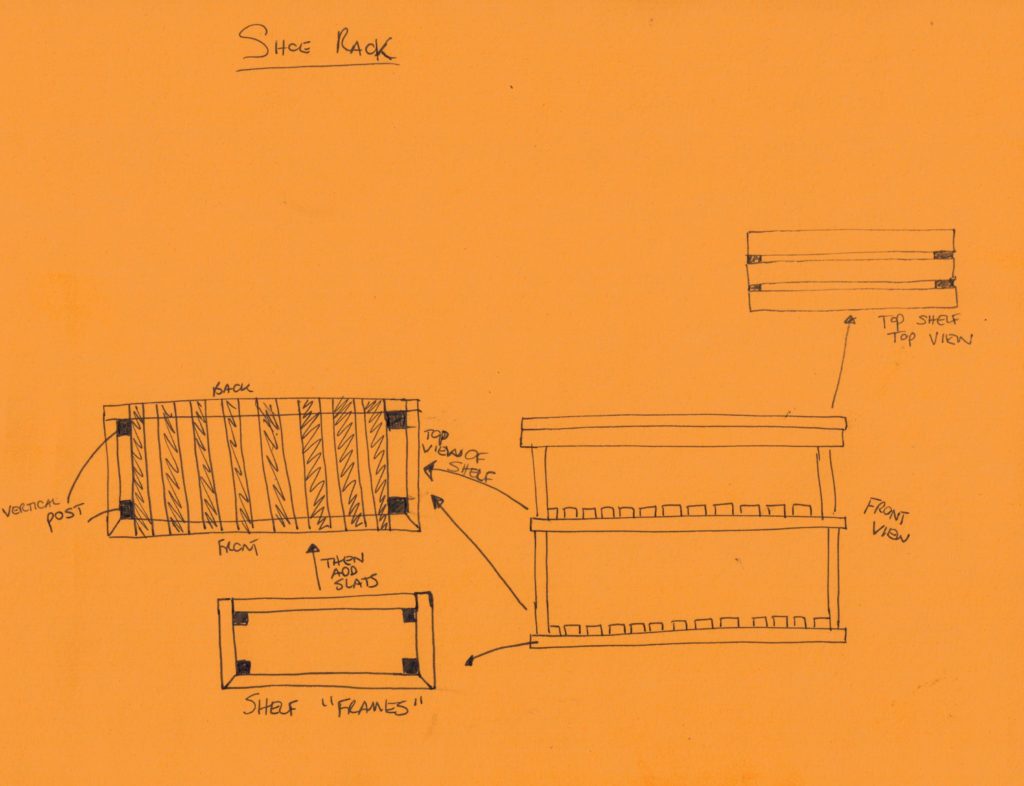
I built this project around wood that was available in a local home improvement store, only needing to cut the pieces to length. I essentially built this project twice. For whatever reason, I built it the first time around securing it with wood nails. I quickly realized this did not leave a sturdy shoe rack. I took it apart and started over using glue- much better. I worked from bottom to top, first building the “frames” for the slats to sit on (see photo diagram). I chose to miter the front corners since I thought it looked a little nicer however I realized later that unless your pieces are sitting perfectly together, there will be gaps.
What I learned from this project:
– Wood glue is amazing.
– Finishing is a very important process in a project and I should have watched a couple videos on painting wood first.
If you’re local and want a shoe rack like this, let me know. I would love the practice to build it again.